Creating Basic UI form in Pega Constellation
- techpapers

- Jul 28, 2025
- 3 min read
In this blog, we will discuss how to create a basic UI form to accept data from a user and show it in a case UI.
Let's assume a use case of a Retail Banking Application, and there is a case type for Customer Registration or KYC. Every time a new customer visits the bank, a bank employee will ask for the basic details of the customer and complete their KYC. In this blog, we will create a case that will accept data from the UI and keep the data in the clipboard. This is to keep the blog simple and easy to understand for all.
We assume you have already created a Pega Constellation application.
Create a new data type called Customer in the Pega application. You can add a new data type from App Studio -> Data -> Click on the New button. Add all basic fields to this data type like First Name, Middle Name, Last Name, and Address. We have created one customer data type as shown below.

In Pega Constellation, every data type is associated with Views [in simple terms, it is a Section but not actually the same as a Section]. Pay attention to a tab called UX in the above image. Click on that tab, and you will see different tabs like Full Page View and Other Views.

Click on the Other View tab [For now, we will not go into what Full Page View is, etc.]. Under the Form section, click the + Create link to configure a new view for the Customer Data type.

For this demo, let's assume we want to input the customer's identification details like PAN card or Aadhar card number. Name the view as Identification Details, accept all other settings as default, and click on the Submit button.

After clicking on Submit button a UI like below will be shown, here we need to select the properties of the Data table to show in View. For our purpose, we need to show type of Identification and its detail. To achieve this, click on + Add Link

Click on Fields and select two fields of the data type: 1) Identification Type and 2) Identification Detail. Click the Add button.

After this, the fields you selected will be shown on the left side of the window with specific UI controls. The UI control will be decided by Pega Constellation based on the data type of the field. For example, if the data type of a field is Text, then the UI control for that field will be a text input. Click on the Save button, then click the <-Back link.

Now it's time to show this View to Case UI. For this, create a case, for example, Customer Registration. Click on the Data model tab of the case and add the field name Customer. Select other settings as shown below.

In this case I have added a process called Identification Info.
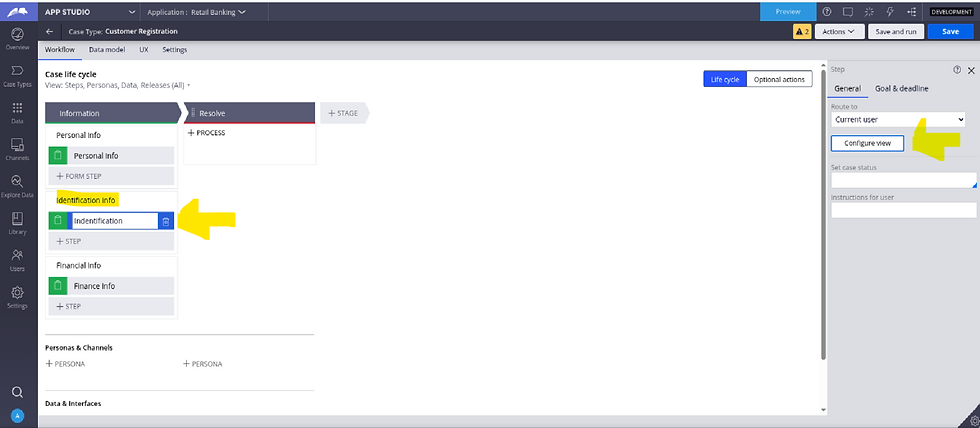
Click on the First step of the process and click on Configure view button. Click on + Add button.

Click on Fields section

Select arrow > next to field Customer.

This will show two information about Customer Data field of the case type. 1) fields of Customer data type and 2) Views of the customer data type. Click Arrow next to View.

This will show all the views under Customer Data type. This will also show the View we created in the above step. Select the Identification Detail view and click on Add button.

After clicking on Add button, the View will be visible in the left pane of the Configure View window. Click on Submit button to return to case manager view and save the case settings we did so far.

Run the case, you will see UI like this. Since I have configured Identification type as Pick list, the UI for this field is a drop down. You can try adding other field of the customer data type and UI will be rendered with proper UI controls.


If you have come this far, it means you really want to try this, but you are finding it difficult to follow the process or missed a few steps in between. Then, nothing to worry about. You can reach me at sandeshtorajesh@outlook.com, and I will send you the RAP file of this application, which you can import and check all the configurations I did.


Comments